Nexon’s free-to-play looter shooter boasts systems upon systems, which can get overwhelming. Here’s what you need to know to survive.
Just like in Pokemon, you can choose three starter Descendants when first entering the game – Viessa, Lepic and Ajax. Which one you opt for is entirely up to your playstyle – Viessa is great at crowd control and freezing enemies to inflict shatter damage. Lepic can group enemies and blow them up with grenades while inflicting burn damage. Ajax is tankier and can deploy walls and circular barriers, which grant damage increases to surrounding allies. The current verdict is that Viessa is the way to go initially, especially since it’s easier to deal with groups of enemies thanks to her Ice abilities. However, if you want to try someone else, you’re not permanently locked out of the other choices.
How to Craft All Descendants
Despite the excessive monetization and high cost of Descendants in the store, it’s possible to research every Descendant for free. It will take time, though, as you need to gather the materials and Gold necessary for their components, research them and then put it all together. Note that regular Descendants cost 400,000 Gold and take about 16 hours to research (aside from Bunny, who you get pretty much immediately). The Ultimate variants require 900,000 Gold and 36 hours of research, plus their components will be harder to net in the early going. If you’re looking for some solid alternatives when starting, Gley and Sharen are two of the stronger options in the game.
Weapons and Ammo Types
The First Descendant doesn’t restrict your weapon choices – if you want to equip three shotguns, then go for it – but the ammo system does. There are four ammo types – General Rounds, Special Rounds, Impact Rounds and High-Power Rounds – and weapons are divided into them accordingly. Your SMGs, handguns, assault rifles and machine guns fall into General Rounds, for example, while scout rifles and hand cannons use Impact Rounds.
Meanwhile, heavy hitters like snipers, shotguns and launchers require High-Power Rounds. Since there’s no “primary weapons get unlimited ammo” system like Destiny 2, you’ll want a mix of different ammo types to ensure consistent DPS uptime. Currently, High-Power Rounds feel rarer, and weapons with the same have lower capacity. If you have a shotgun, it may be better to swap it out for a different ammo type entirely, depending on your build.
How Modules Work
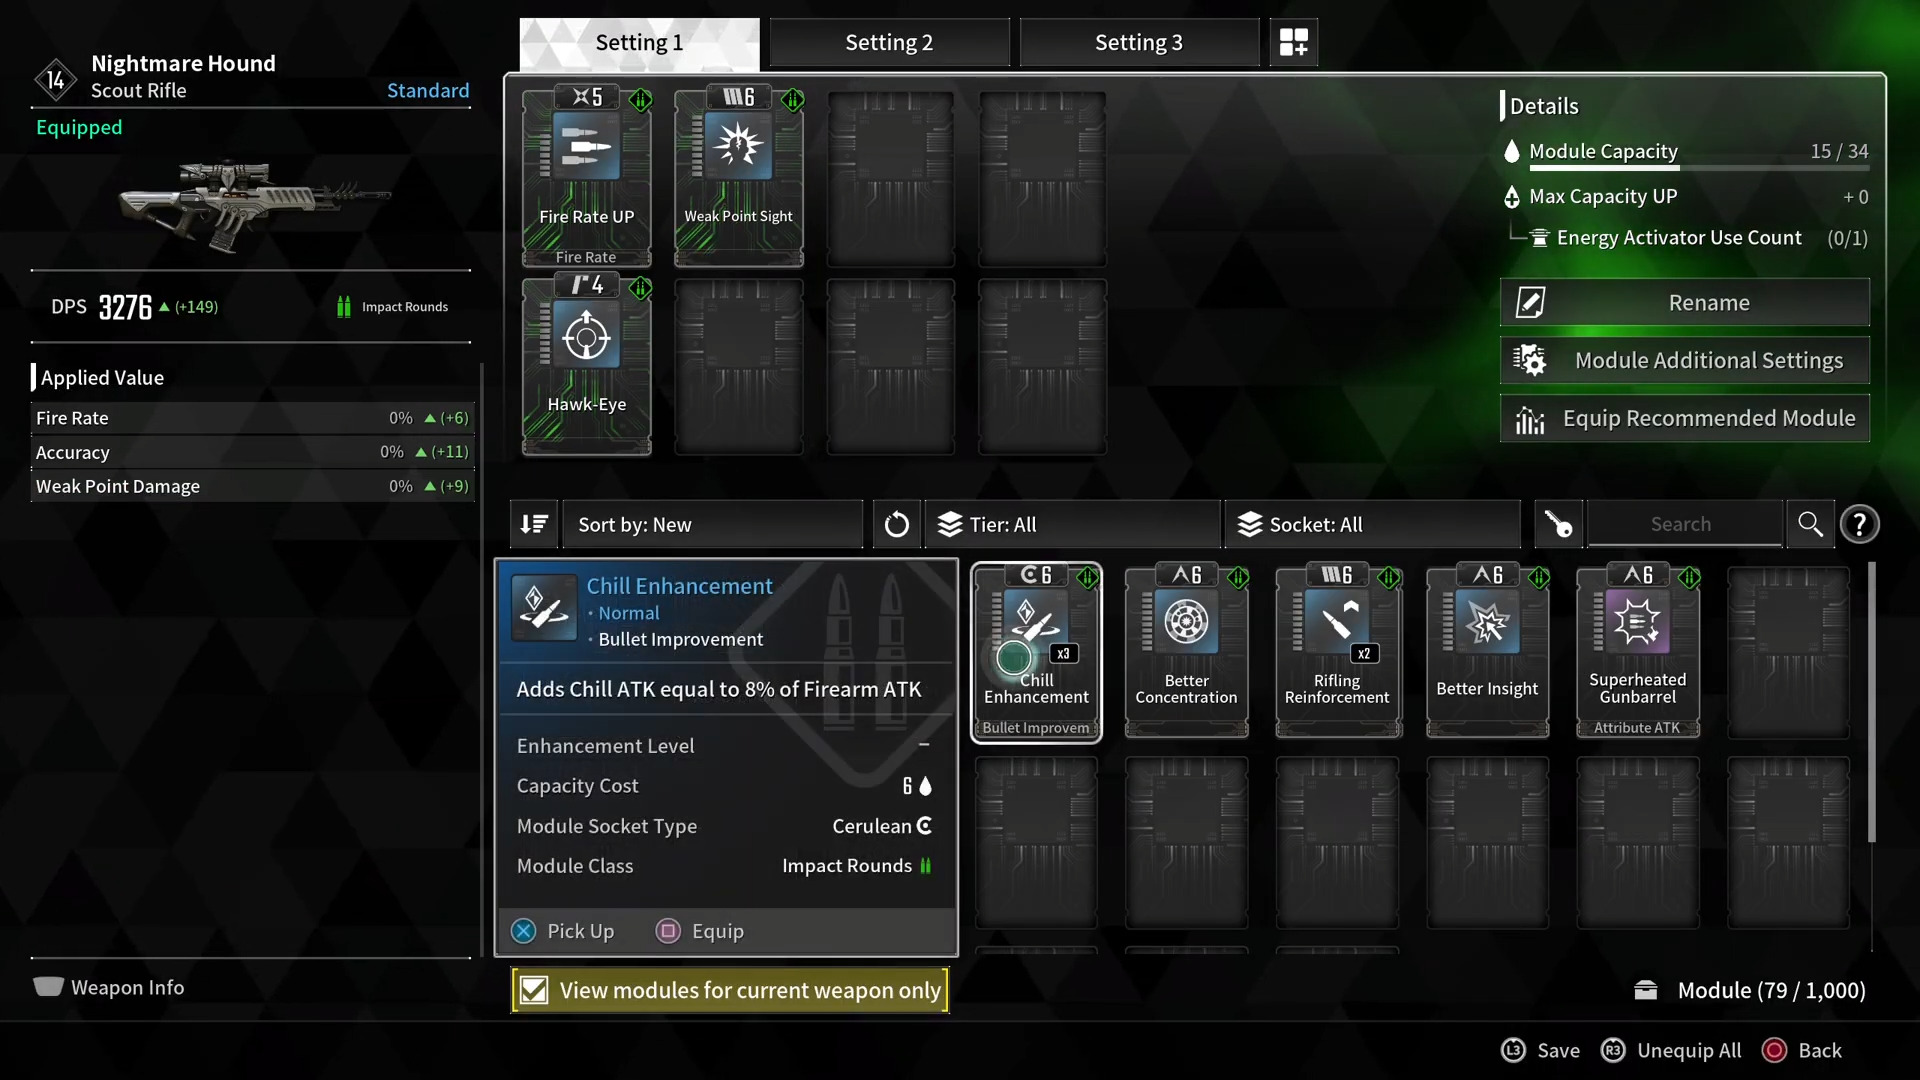
Modules provide various passive bonuses to your character and weapon. They can also modify their behavior, from increased weapon damage at the cost of reload speed to different skills for your Descendant. You can’t equip every Module on whatever Descendant you please – some have varying types, like Reactors, to keep in mind and even specific Mastery Level requirements. Each Module also has an associated cost, and depending on your capacity, they won’t slot in. Mod sockets, aka Polarities, can help in this regard – matching the specific Module to its corresponding socket can cut its overall cost in half.
Module Enhancing Woes
There are many paths to make your Descendant more powerful (some possibly considered unnatural), and enhancing your Modules is one. Whether it’s your character or weapon Modules, strengthening them can be ideal for a quick boost in power since they’re always passively active. However, upon enhancing a Module, its capacity also increases.
Going too far can make it challenging to fit the Module in your current set-up (which the game will warn you about), but it is an option, especially if a Module is a permanent fixture of your build and everything else can somewhat shift around it. Otherwise, the best course of action is to constantly upgrade only the necessary Modules while you’re increasing your Mastery Rank, thus allowing your capacity to keep pace with the upgrades.
Modules Carrying Over
When I started playing The First Descendant, one of the bigger problems while leveling up was constantly switching out Modules as I earned new weapons. Since you constantly get stuff that deals more damage and has better stats than your current loadout throughout the story, it can seem annoying to hop into your inventory, select a weapon and move Modules around. However, that’s not entirely the case.
You’ve probably noticed that the same weapons drop within the same ammo category at higher levels. When modding them, the Modules will carry over, even if you get a higher-level version of a weapon, so your choices effectively remain. Check beneath the three currently equipped arms in your inventory to see the Weapons List. Open it up to see a database of sorts for all the weapons, including those undiscovered, and you can hop directly into one to move around its Modules or check Proficiency Levels.
Choosing a Reactor
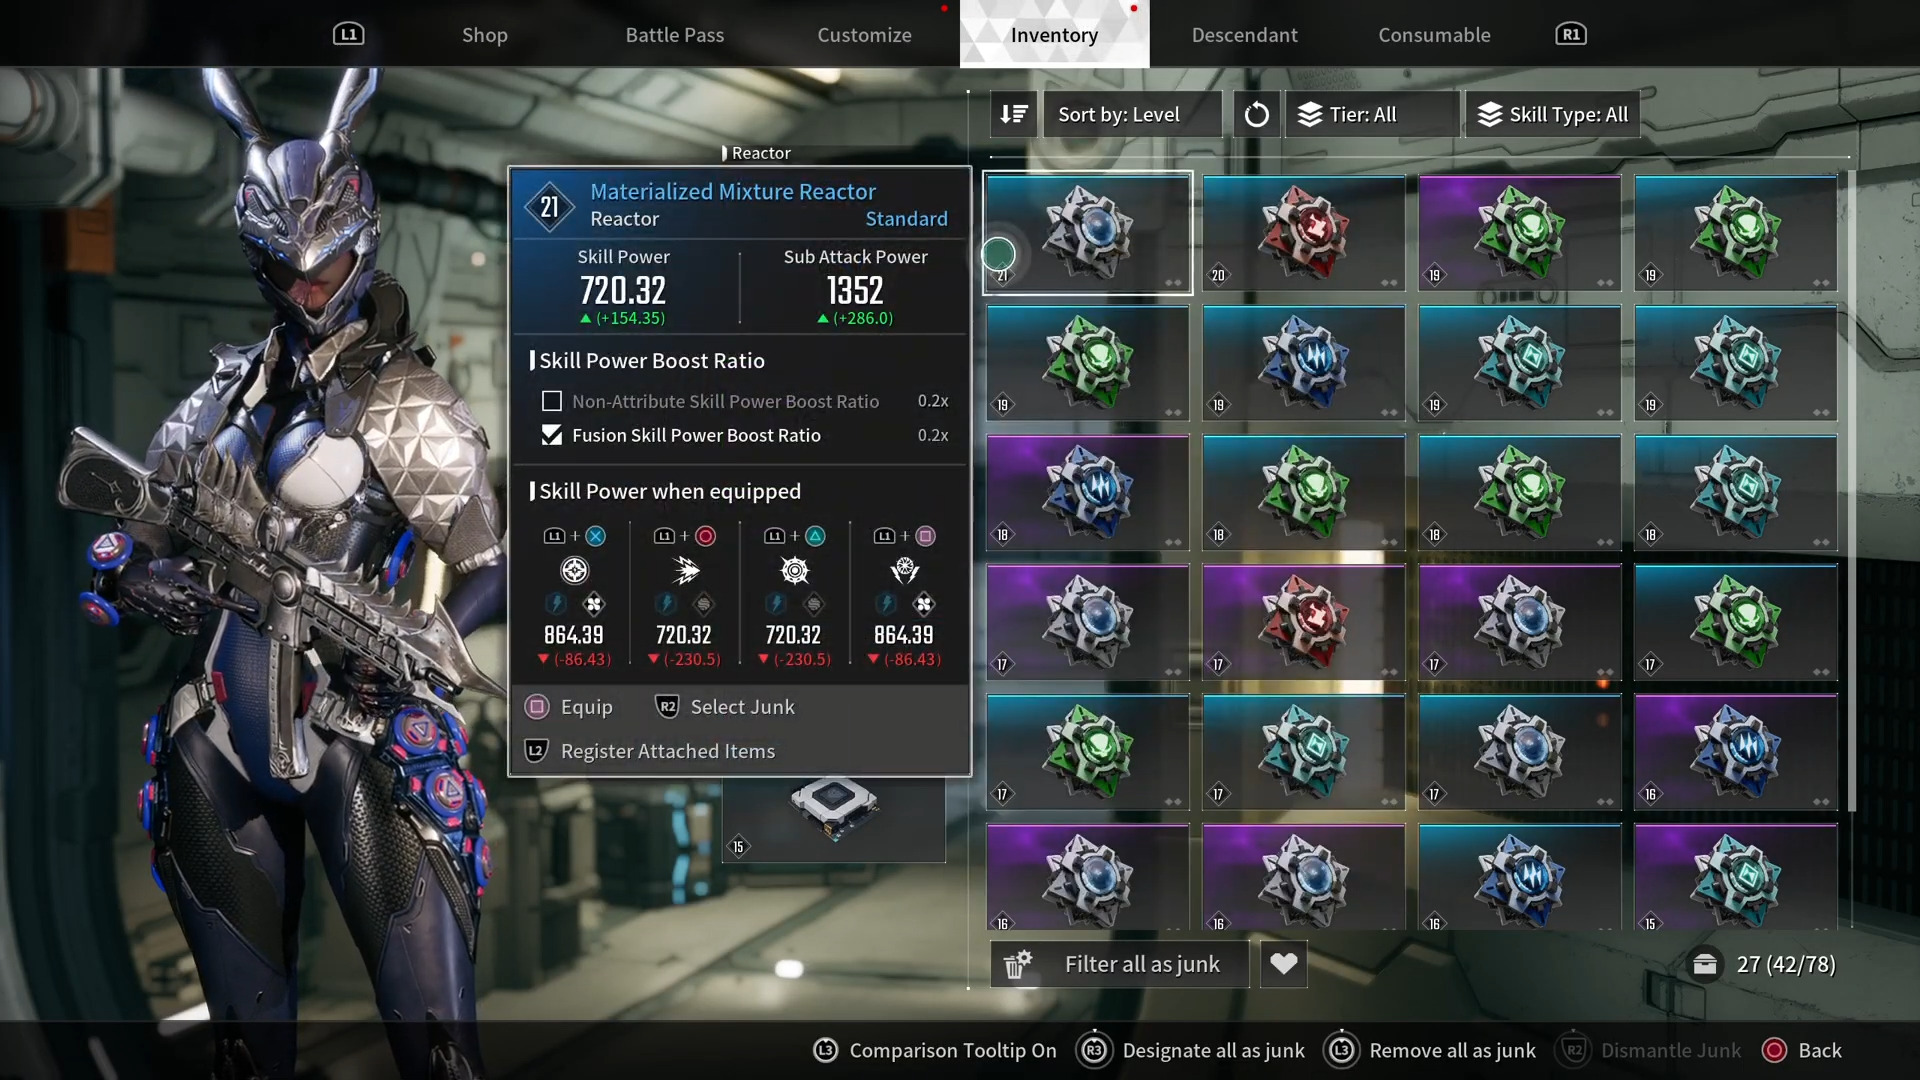
At first glance, Reactors seem like gear that can passively increase some stats, but there’s a lot more to it. Reactors are split into multiple types and fit different kinds of Descendants – Lepic, for instance, can benefit more from Reactors that emphasize fire and burning damage than, say, Bunny. Equipping the correct type is thus key.
If you’re not min-maxing the other stats initially, the best thing you can do is check all the numbers near the bottom – they represent increases to your Skill Power. Given how important skills can be, you initially want a Reactor where all those arrows are green and pointing up. Keep an eye on the Optimization Condition of higher rarity Reactors as well – they’ll demand you equip a certain weapon or weapon type. Do that, and the Skill Power of the Reactor applies at 140 percent. Don’t, and you get the base Skill Power.
Weapon Level Transmission
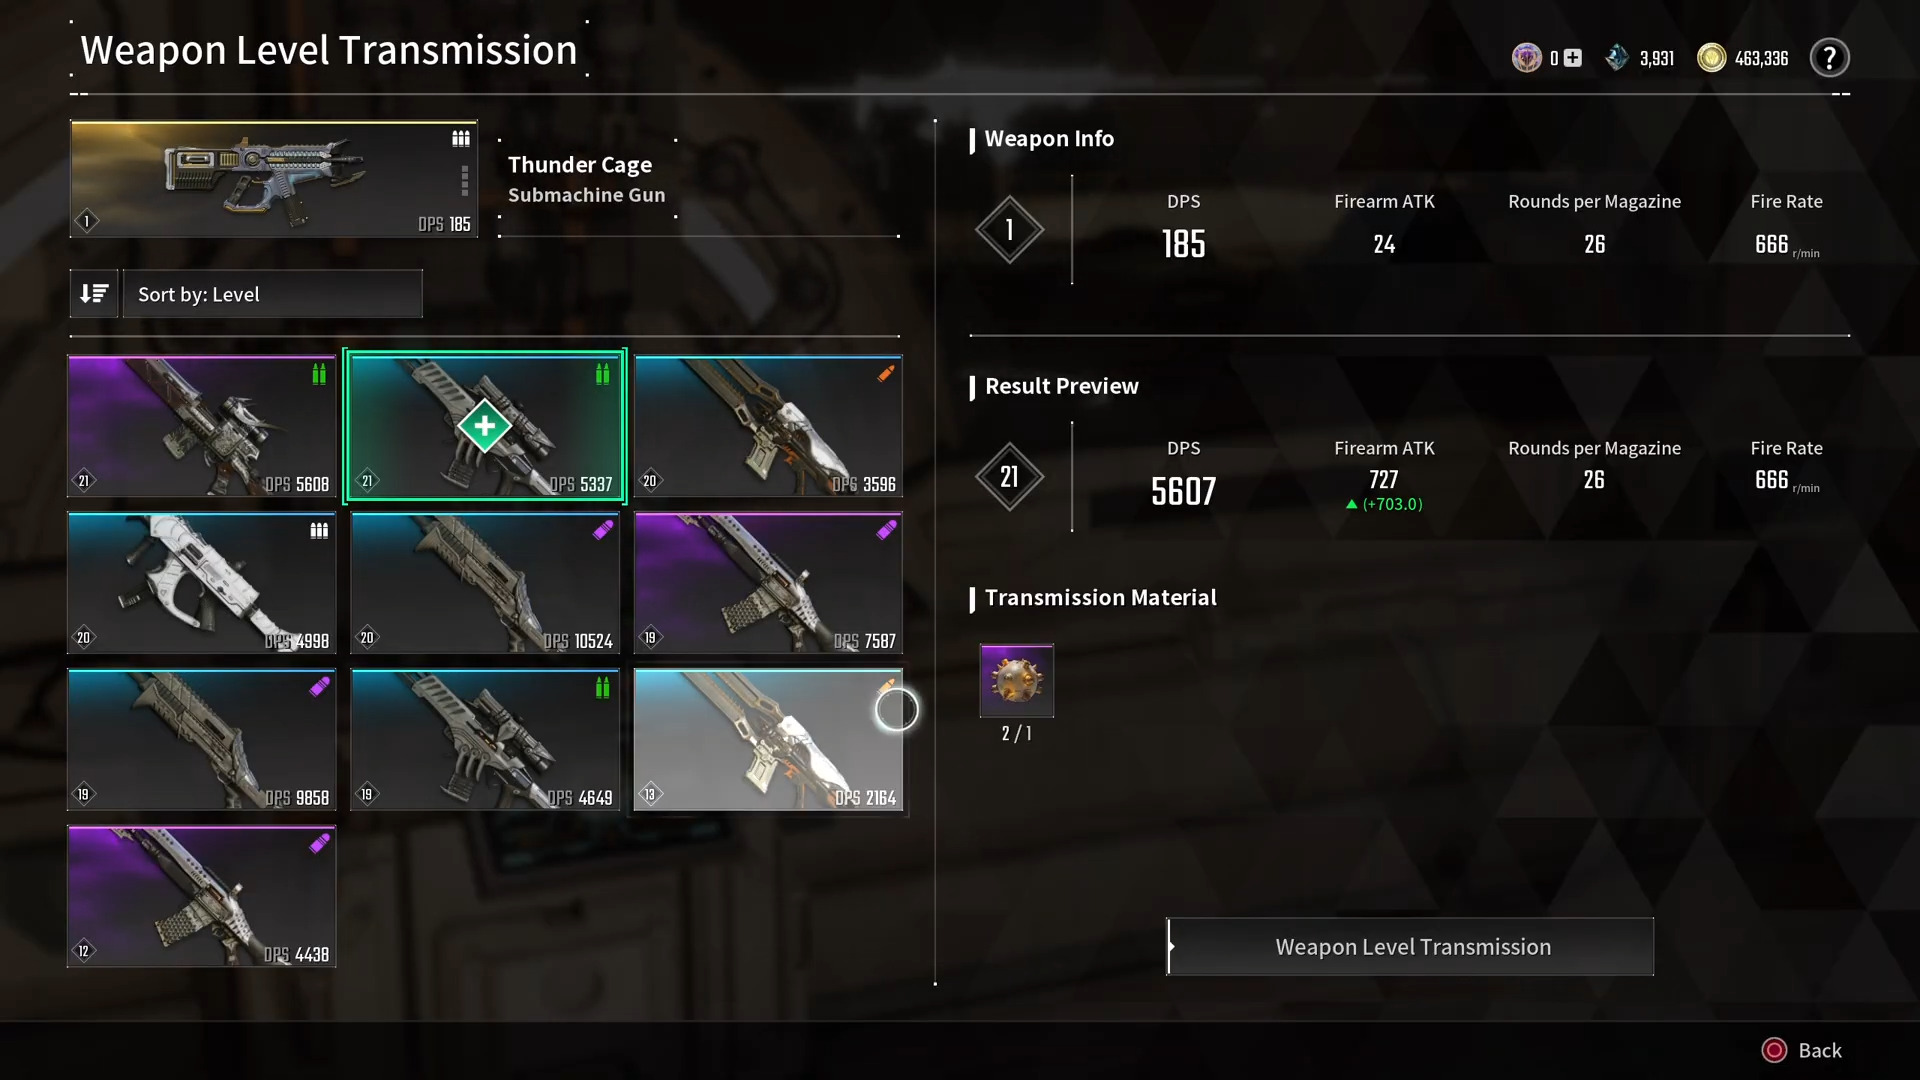
Similar to Infusion in Destiny 2, Transmission allows for consuming higher-level weapons to raise a lower-level weapon. One of the initial questlines involves crafting the Thunder Cage SMG, your first Ultimate Weapon, and since it’s objectively better than a lot of other SMGs, being able to increase its level is a good thing. There is a catch, though – you need Transmission Materials for the process. You can craft these from Superalloys and Liquid Metal, which drop from dismantling weapons, so they’re super-easy to get, but they still cost Gold and take time to research.
Always Be Upgrading (Your Mastery Rank)
After leveling up, you may have noticed the big text on the upper-center of your screen indicating that a Mastery Rank is available. Stop what you’re doing and return to Albion, then visit the Prime Hands (to the left of where you spawn) to upgrade your Mastery.
While it accumulates naturally as you play, Mastery Ranks give you more Module capacity for your Descendant and weapons, increased storage slots and equipment inventory, and other benefits. These won’t be available until you go to the Prime Hands and ascend to the next rank. However, the game seemingly keeps track of your Mastery Rank XP after a new rank becomes available. If you delay returning to base, that excess XP will go towards your next rank.
Turn Off Battle Voices
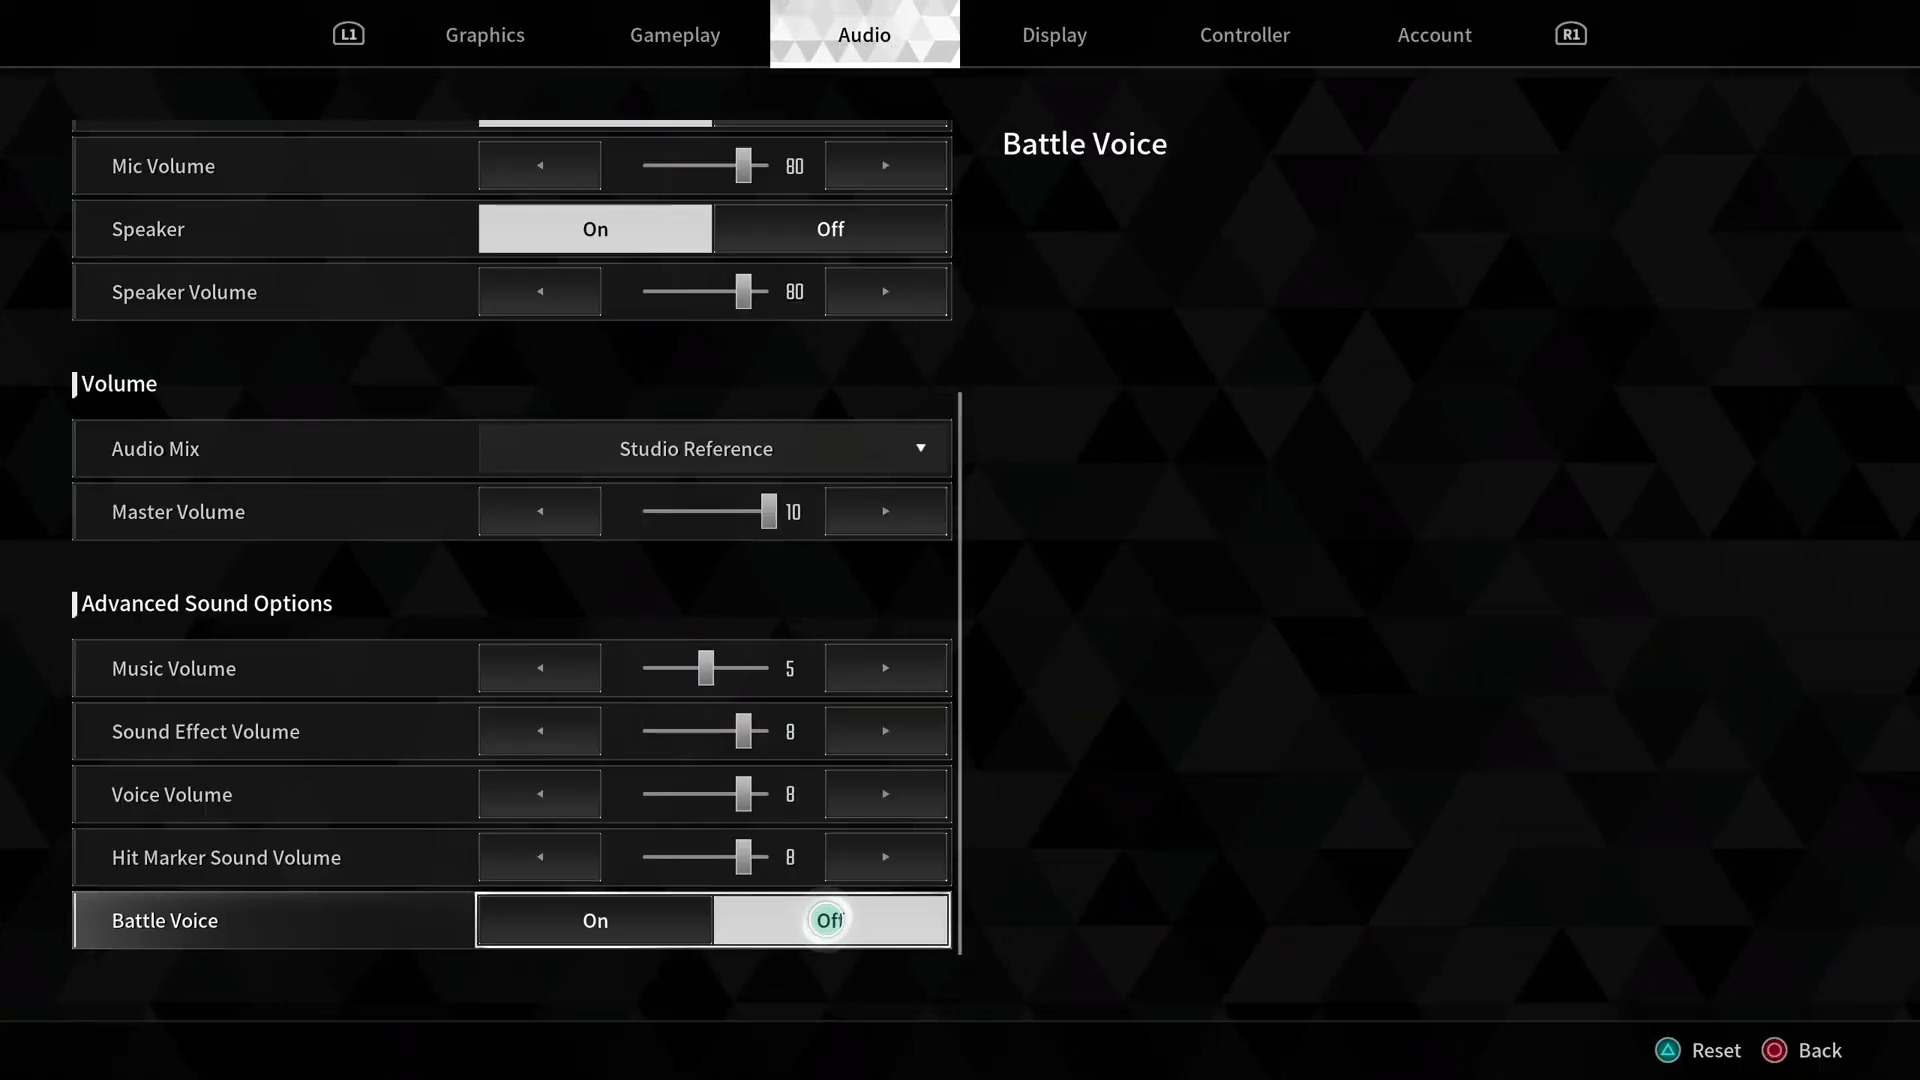
While your comrades in The First Descendant won’t go full Suicide Squad: Kill the Justice League with the battle chatter, hearing their constant callouts can get annoying over time. Heck, constantly listening to my character telling me they’re reloading can grate. Don’t despair – head into the Audio settings, scroll down to the Advanced Options and turn Battle Voices off. You can also modify the volume of hit markers, which is nice.


